Ambimax® Developer Guide
Welcome to the Ambimax® Developer Guide! This collection of documents will get you up and running as an Ambimax® developer.
Source
The source of this documentation can be found in the GitHub Repo Developer Guide.
Best Practices
Introduction
This section collects resources related to best practices.
API development
Introduction
This page describes some best practices when developing APIs.
Document your data
A good starting point in effective communication is a clear and standardized communication model. An API does this by documenting its available endpoints and the data it needs and serves. Describe your data using JSON Schema. To document your endpoints, provide an OpenAPI specification for your service. Ideally this should be served by the root of your api. If your api provides serverless functions or things that are not necessarily publicly available, document their required data schemas as well.
To prevent a maintain-hell, use automation tools like json-schema-to-typescript or ajv to use your schemas as the source of truth and validate the data at the same time.
To be continued...
Continuous Integration (CI)
Introduction
This section describes best practices regarding Continuous Integration (CI).
GitHub Actions
Introduction
GitHub Actions is a tool provided by GitHub that allows one to author CI/CD pipelines within GitHub itself. It currently is our goto method of implementing CI/CD in our projects. Older projects use Jenkins.
Available actions
This list contains actions that are available in our organization namespace. Those actions should always be preferred instead of third party actions. If you are using a third party action, make sure to fork it into our organization and prefix its repository name with action-.
The table below might be outdated. If you notice that an action is missing, add it.
To get a list of all actions in the Ambimax organization, click here.
| Name | Description |
|---|---|
| action-docker-build | Build docker images using Dockerfile or docker-compose. |
| action-docker-push | Push docker images to a docker registry. |
| action-docker-deploy | Deploy a remote docker image. |
| action-get-latest-successful-commit | Get information of the latest commit that had a successful GitHub Actions workflow run. Useful for monorepos. |
| action-cancel-previous-runs | Cancel all previous runs on a branch. Useful for pipelines with long build times an frequent development pushes. |
| action-report-coverage | Report code coverage using an lcov file |
| action-pull-request | Create a pull request to the base branch |
Projects
Click here to discover all projects that are currently using a GitHub Actions pipeline.
Jenkins
Introduction
Jenkins is an open source tool for CI/CD. It is used by our older projects. Newer projects should use GitHub Actions instead.
Projects
Click here to discover all projects that are currently using a Jenkins pipeline.
Creating a new repository
Introduction
This page describes what steps to take when creating new repositories.
Declare a maintainer
Every repository should have at least one maintainer. The maintainer is responsible for the repository and has to make sure, it works as intended. The maintainer should be added to the README.md of the repository.
If you are currently working on a repository that has no active maintainer, consult the repository's creator.
Manage access
By default, only you can push to your repositories. At least make sure you add ambimax/developers with the Write role to the repository.
If the maintainer for the repository is not you, make sure to also add the maintainer as "Admin".
Setup branch protection
You generally want your main branch protected from direct pushes. Make sure to setup an appropriate branch protection for the repository.
A branch protection can be setup at Settings > Branches
A good starting point is to enable "Require pull request reviews before merging" with "Dismiss stale pull request approvals when new commits are pushed". This sets up the requirement for Pull Requests to have at least one reviewer before they can be merged.
If your repository has a Continuous Integration Pipeline setup (it should), you can also enable the "Require status checks to pass before merging" option. This sets up the requirement for Pull Requests to have a working CI Pipeline at their last commit.
EditorConfig
Introduction
This page describes the use of an .editorconfig file.
What is EditorConfig?
Editors tend to use different default settings when configuring indent style, tab size and newline characters. To simplify configuration, EditorConfig was created. It lets supported editors load their configuration from a shared .editorconfig file, thus no editor-specific configuration is required.
Note that EditorConfig only sets basic editor related properties. For more advanced formatting options, you need to configure a code formatter for your language.
How can I use it?
PhpStorm
Make sure to install the EditorConfig plugin.
Visual Studio Code
Make sure to install the EditorConfig extension. If you installed our recommended extensions, you already have it installed.
Is there a default .editorconfig?
You generally should prefer defining your EditorConfig configuration on a per-project-basis. But for a good start, you can use this repository's editorconfig.
Pull Request Workflow
Introduction
This page describes how our workflow for Pull Requests works.
Workflow Overview
Create Branch
Before a pull request can be opened, please follow these steps:
- Create a branch on git
- Add your changes with
git commit(use Conventional Commits) - Push your changes to GitHub with
git push
Create Pull Request
Your code is ready for production. To merge it you need to open a pull request. If you are not sure or you still want to work on it please open your pull request as draft.

- Add easy understandable description
- Assign reviewer(s)
- Create pull request or draft
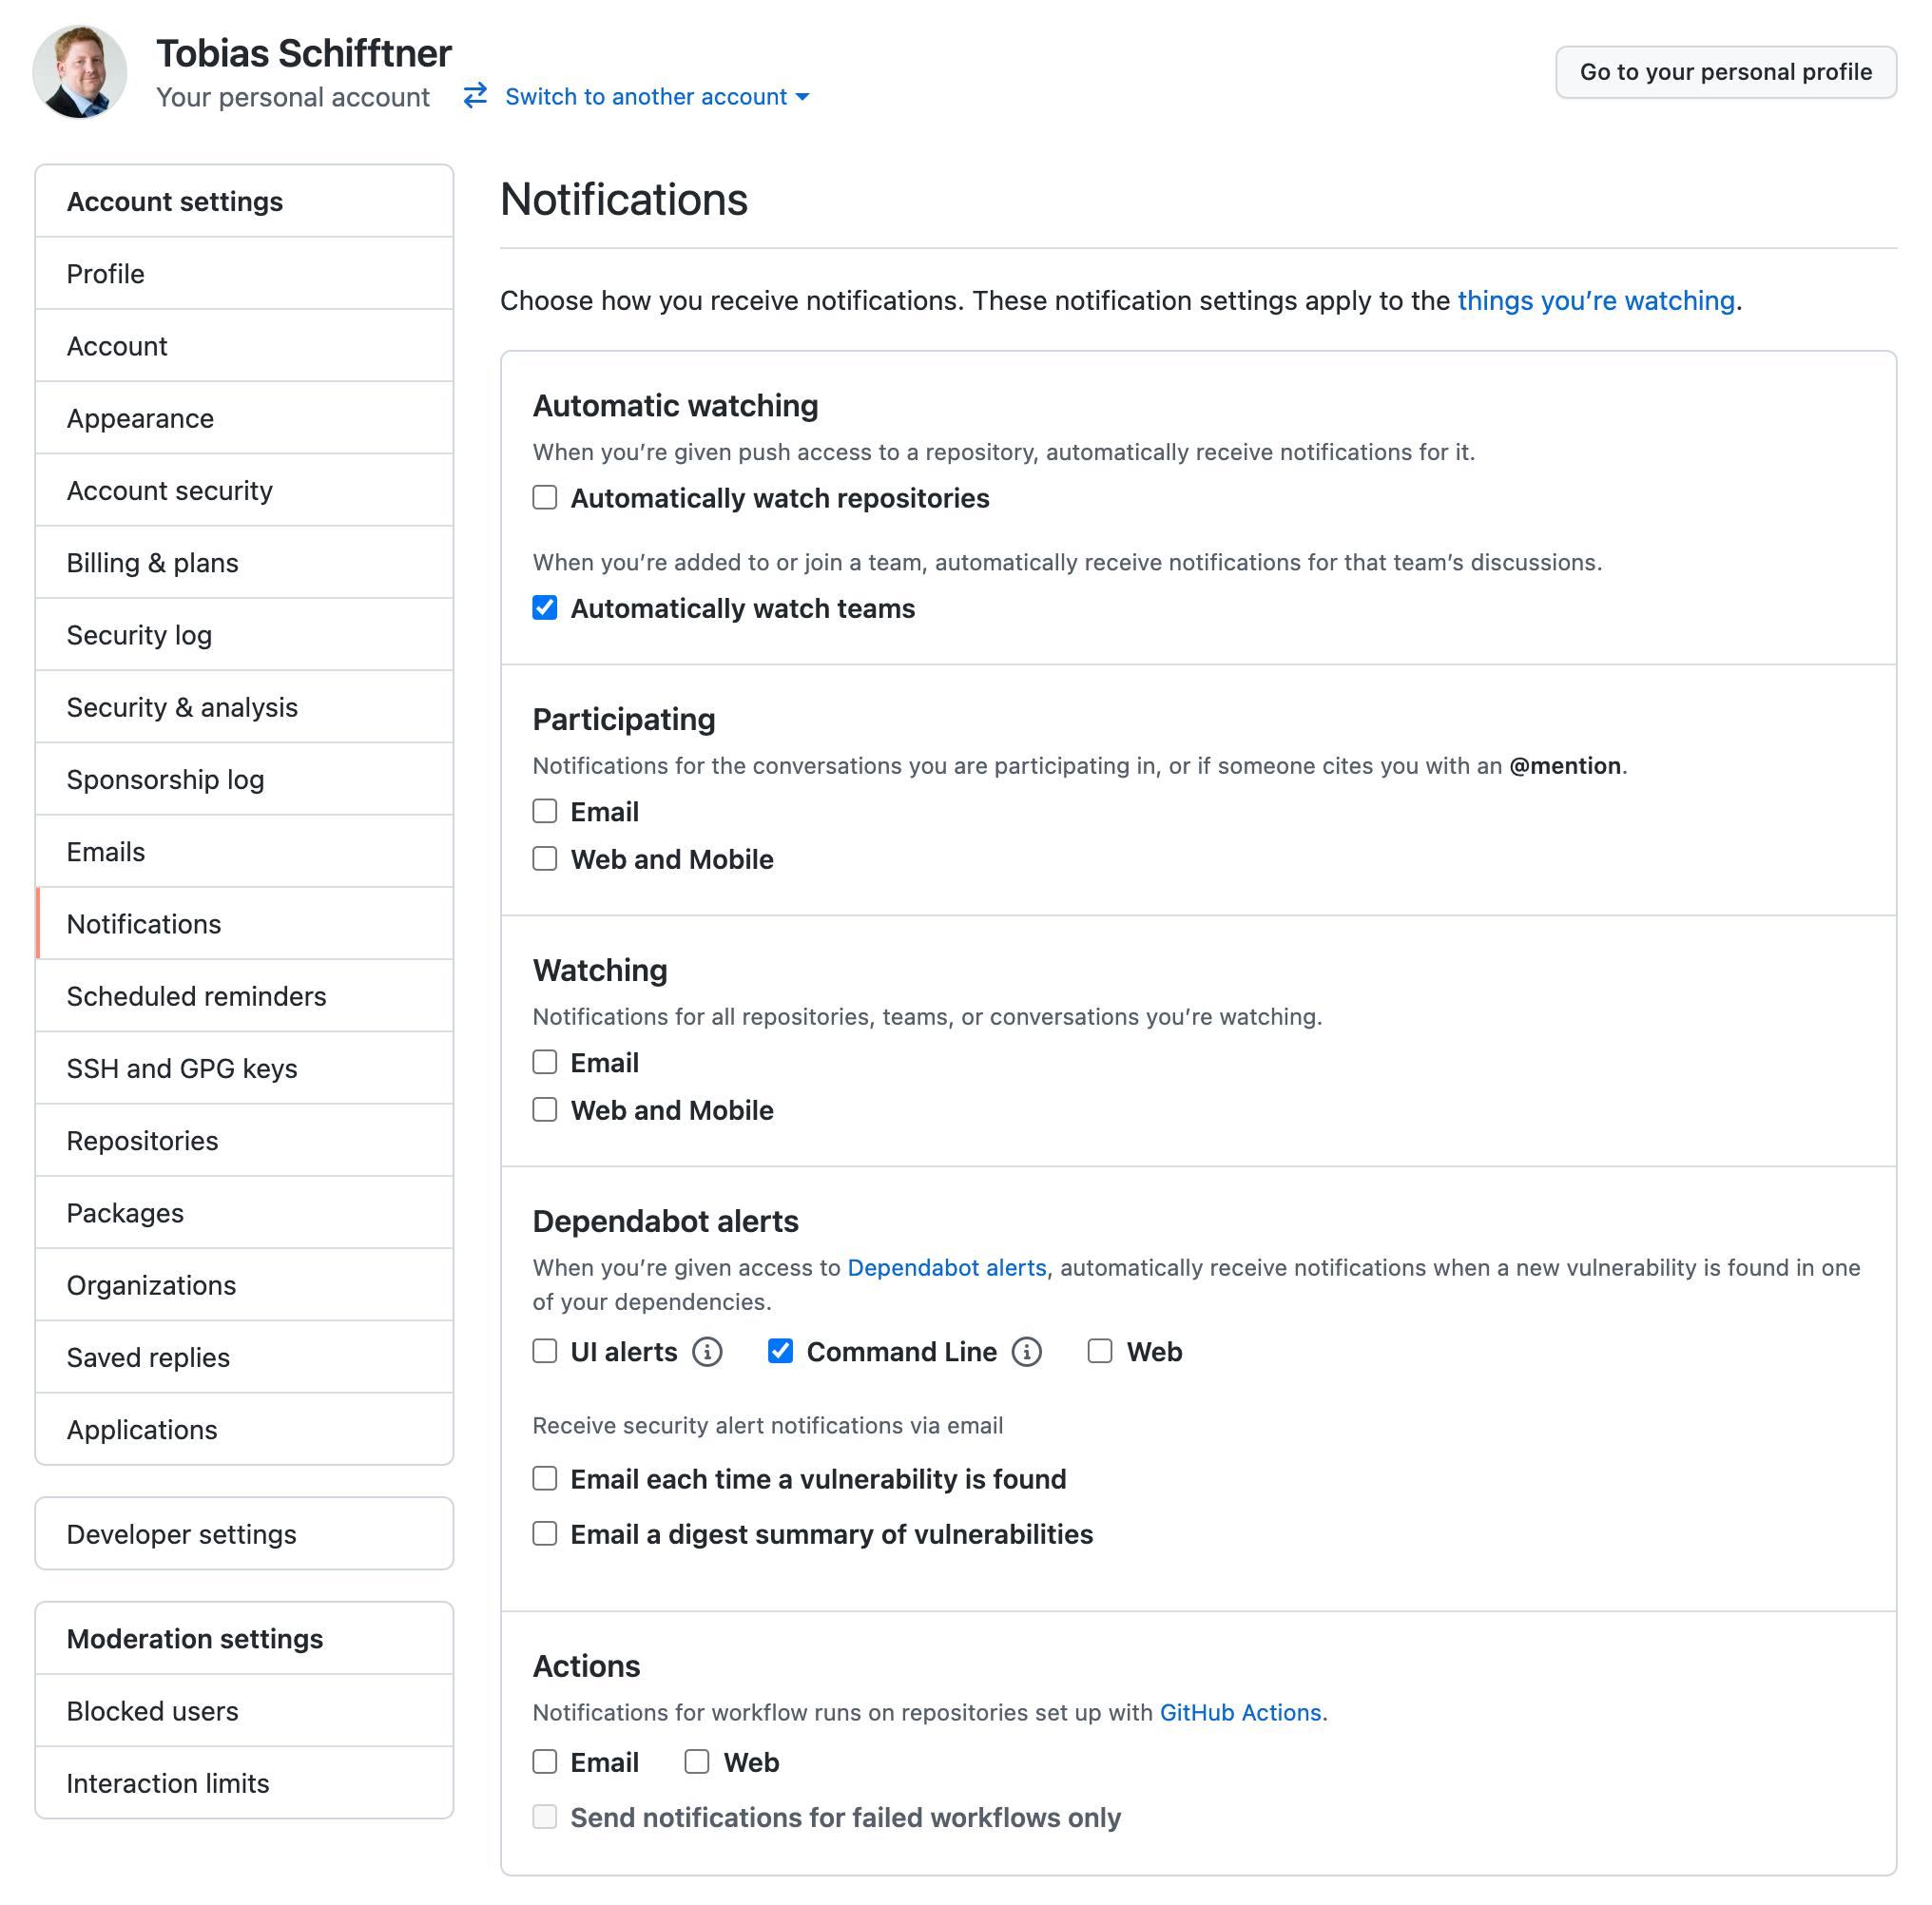
Notification
Ensure to enable notifications for GitHub
Review open pull requests
Someone opened a pull request and assigned you for review.
- Please define yourself as reviewer first (so others see you are on it)
- Review pull request
IMPORTANT: With assigning as reviewer you take responsibility for this pull request. Try to solve issues as soon as possible. No other should be required to get involved.
Handle requested changes
When changes are requested you have two options:
- Accept suggestion by using
Commit suggestionbutton - Resolve issue after conversation by using
Resolve conversationbutton
Please resolve all issues first. Then request a pull request review again. Either by using the button on the upper right corner
or by using the function at the bottom of the pull request.
Avoid Discussions
Comments are for quick notes only! Avoid starting a discussion. Better schedule a meeting to discuss open issues. Afterwards close those comments with a small hint to the discussion results.
Semantic Release
Introduction
This page describes the use of an semantic-release file.
What is Semantic Release?
Semantic Release solves one major problem in software development: Releasing software with versions that both make sense and are easy to create. It does this by analyzing git commits and deriving a new version for automatic releases from them.
Git commits
Your git commits must follow the Conventional Commits format in order to provide meaning to semantic release.
Git commit message example for a normal fix:
fix: summary of changes
Git commit message example for a breaking change release:
chore: Trigger major release for previous commits

BREAKING CHANGE: Did some stuff
Example 1:
You have worked on a fix for an existing feature. This fix does not break any backwards compatibility (i.e. the previous version works the same if upgraded to your new code). To now create a commit for this feature, you would have to type the following message:
fix(JIRA-123): Add some awesome new feature
Note: The JIRA-123 is the ticket you are working on and everything past the : is the description for your addition. This will increase the patch version.
Example 2:
You have worked on a new, isolated feature. This feature does not break any backwards compatibility (i.e. the previous version works the same if upgraded to your new code). To now create a commit for this feature, you would have to type the following message:
feat(JIRA-123): Add some awesome new feature
Note: The JIRA-123 is the ticket you are working on and everything past the : is the description for your addition. This will increase the minor version.
Example 3:
You have worked on a new, backwards incompatible feature. This feature does break backwards compatibility by changing some logic in other features. To now create a commit for this feature, you would have to type the following message:
`feat(JIRA-123): Add some awesome new feature
BREAKING CHANGE: Other feature now requires some changes to the configuration`
Note: The JIRA-123 is the ticket you are working on and everything past the : is the description for your addition. The BREAKING CHANGE Is in the body of the commit (press Enter twice). Here you describe, what changed in the new version that makes it incompatible with the old version. This will increase the major version.
Breaking changes
If a commit introduces a breaking change (regardless of the commit type), you can add a BREAKING CHANGE section to your commit. This will automatically increase the major version on next release.
What if I made a mistake in one of my commits?
If you are working on a separate branch, you can simply rewrite your commit messages. You need to force push after the rebase.
How can I add it to my project?
Javascript project
Note: This section is not detailed enough. For now it is best to see how some of our projects implement semantic release.
Add semantic release to your project:
yarn add -D semantic-release
If you are working on a PHP project, add our composer plugin as well:
yarn add -D @ambimax/semantic-release-composer
Note: You need to be authenticated with our Node.js registry to install the plugin.
PHP project
Ensure version field in your composer.json:
{
    "version": "0.0.0"
}
Add semantic release rules file .releaserc.json into project root:
{
  "branches": ["main", "master"],
  "tagFormat": "${version}",
  "plugins": [
    "@semantic-release/commit-analyzer",
    "@semantic-release/release-notes-generator",
    "@semantic-release/github",
    [
      "@semantic-release/changelog",
      {
        "changelogFile": "CHANGELOG.md"
      }
    ],
    "@ambimax/semantic-release-composer",
    [
      "@semantic-release/exec",
      {
        "prepareCmd": "echo \"SEMANTIC_VERSION=${nextRelease.version}\" >> $GITHUB_ENV && echo \"GIT_VERSION=v${nextRelease.version}\" >> $GITHUB_ENV"
      }
    ],
    [
      "@semantic-release/git",
      {
        "assets": ["composer.json", "CHANGELOG.md"],
        "message": "chore(release): ${nextRelease.version} [skip ci]\n\n${nextRelease.notes}"
      }
    ]
  ]
}
Note: If there is no composer.json, please remove line
"@ambimax/semantic-release-composer",from .releaserc.json file
Add github action .github/workflows/release.yml for automatic release creation:
Note: The versions of the semantic release can be found on Docker Hub. Make sure to use the newest version when setting up new projects.
name: Release

on:
  push:
    branches:
      - "main"
      - "master"

  pull_request:
    types:
      - opened
      - synchronize

jobs:
  package:
    name: "Release"
    runs-on: ubuntu-latest
    steps:
      - uses: actions/checkout@v2
        with:
          fetch-depth: 0
          persist-credentials: false

      - name: Roll out semantic release
        id: release
        uses: docker://ambimax/semantic-release:1.2.0
        env:
          GH_TOKEN: ${{ secrets.AMBIMAX_GITHUB_RELEASE_TOKEN }}
Editors
Introduction
This section collects resources related for IDEs and editors that are currently in use.
PhpStorm
Introduction
This page contains useful resources related to PhpStorm. We mainly use PhpStorm for PHP based projects. If you are working on Node.js based projects, you might want to use Visual Studio Code instead.
TODO: This sections needs to be expanded upon
Visual Studio Code
Introduction
This page contains useful resources related to Visual Studio Code (VSCode). We mainly use VSCode for Node.js based projects. If you are working on PHP based projects, you might want to use PhpStorm instead.
Extensions
We recommended some extensions that can be found here.
General
Introduction
This section contains general information for developers at Ambimax® GmbH. This means every information here is important for every developer. It is highly recommended that every developer knows the information that is stored in these articles.
Information gathering
Introduction
There is a time in the life of every developer, where they have to look for additional information to do their job. This article will guide you on what to do if these researches will most likely take more time than what seems appropriate for your task.
We differentiate between two possible scenarios. In the first one you have a task and need to do a little research to do that task. In the second scenario you have a basic problem with the used technologies and want to search for a better basis to do some things.
First scenario: Research for your task
This scenario you will encounter the most. You get a task to do from a ticket, and you don't know how to do that task yet. So you will do some research. No problem, just go ahead. But there are some things you have to do after you did that research.
- Inform your team in the daily standup.
- Document your findings, the best place is the developer guide. Here you can put short descriptions of your problem and how to solve it or just put some useful links here.
- Present your findings to your team or every developer. The best time for this presentation is either the sprintreview or an extra event
Second scenario: New technologies
We all know that new is always better, but sadly we don't have the time to implement all the cool new things that are out there. This means we have to selectively try to implement the best things. Now you say "I read of this cool new thing. How can I try it out and call it work?" Fret not here is a short guide how you can just do that.
- Inform our CTO Tobias Schifftner of your intentions and ideas. Use this small checklist to send him the most important information:
- How did you hear about this technology?
- Why do you want to learn more about this technology?
- What problem can we as a company solve?
- Do you want to just read about this solution or do you want to test it out?
- Do you need some funding to test it out?
- How much time do you think you need to learn enough?
- If the idea seems good. The next step is to inform Pascal Kunz, so he can decide together with Tobias S., if the time investment is okay.
- What to do after you finish your research
- Document your findings
- Inform Tobias Schifftner to decide if and how to implement your findings in our future works
- Present your findings to all developers
- Extend the developer guide
- Start your project
Outro
Now that you know how to deal with information gathering, you should not have to worry about this ever again.
Company website (ambimax.de)
Our website can be found at ambimax.de. The website is a static website built using sapper, the predecessor to SvelteKit. Content is managed using Prismic.
Deployment
The website is deployed as a static website (only html, css and js; no sever-side logic) to GitHub pages. See the next section to find out more.
Relevant repositories
Below you can find a list of all relevant repositories related to the website:
ambimax/website-project-ambimax-gh-pages
Contains the static deployment to GitHub pages.
Snipe-IT
For tracking and managing our company assets, we use the open source Snipe-IT. You can find the live instance at snipeit.ambimax.xyz.
Deployment
The deployment is managed by terraform. Snipe-IT is deployed using a docker container to the ambimax-intern kubernetes cluster on Digitalocean.
Relevant repositories
Below you can find a list of all relevant repositories related to the website:
ambimax/terraform-deployment-snipeit
Terraform workspace configuration for the Snipe-IT deployment.
ambimax/terraform-deployment-kubernetes
Terraform workspace configuration for the kubernetes cluster.
How-Tos
Introduction
This section provides some useful How-Tos.
If someone might need to know how something is done, you should write it down in this section.
K8s ambimax-intern
Introduction
ambimax-intern is our Kubernetes cluster mainly for internal stuff.
It is managed by Terraform in this workspace: k8s-ambimax-intern.
Here you can find helpful how-tos about the cluster.
Table of contents
Renew SSL certificates
Introduction
About every 90 days the SSL certificates for all domains have to be renewed manually, because the cluster is not configured to do it automatically.
Steps
- Go to the "Variables" section in the Terraform workspace: k8s-ambimax-intern/variables.
- Look for the variable
cert_versionand increase the value by one. (e. g. 8 -> 9) - Start a new run by clicking on "Actions" -> "Start new run" in the upper right corner:
- Description: "Renew certificates"
- Type: "Plan and apply"
- Apply the plan after the run finished.
Reset load balancer droplet
Introduction
Since a load balancer costs not a little money, a former employee decided to create an own load balancer for the ambimax-intern cluster at the cost of a droplet. This load balancer droplet has the private IP of the cluster hard coded in /etc/nginx/nginx.conf.
If no app or service in the ambimax-intern cluster is available and returns a nginx "Bad Gateway" page with a nginx version of 1.18.0 (at the moment of the writing), this how-to is the right one. The cluster has been recreated, the Kubernetes version has been upgraded or something else, so the private IP has changed.
With the help of this how-to you will be able to reset the private IP in the /etc/nginx/nginx.conf of the load balancer droplet.
Steps
- Open the Droplets page on DigialOcean and select the
ambimax-intern-k8s-*Droplet to copy the new private IP of the cluster. - Go to the "Access" section of the load balancer droplet: ambimax-intern-k8s-lb.
- Open a connection to the droplet via the "Recovery Console" feature. Credentials are stored in the LastPass entry "Login ambimax-intern-k8s-lb root".
- Open the
nginx.confwithnano /etc/nginx/nginx.confand adjust the IP of the cluster upstream to the new private IP of the cluster from the first step. Often it is just a switch from10.114.0.3:32080to10.114.0.4:32080or vice versa. - Save and close the file with
CTRL + O,CTRL + MandCTRL + X. - Restart nginx with
service nginx restart.
Now all services should be available again.
Azure
Introduction
This page gives you some information about how things are done with/in Azure.
Adjust Quotas In Our Subscription
Introduction
Sometimes the limit of a quota for a resource in our Azure subscription is set to low and we have to increase it manually to go an with our work.
Below you can read the steps to take to adjust a quota.
- Log in to Azure with
[email protected]. - Go to the service Subscriptions (in german: Abonnements) and choose our one and only subscription Ambimax.
- Now click on Usage + Quotas (in german: Nutzung + Kontingente) to see a list of our current usage/quotas.
- Adjust it how you need it.
More Information
If you made the steps above and Azure says, that it is not possible to increase the limit of a quota, you have to create a support request. To do so, click on the button Request a quota increase (in german: Kontingenterhöhung anfordern) The author of this page never had to create a support request, so he can not provide more information at this point.
Renew Azure credentials for Terraform
Introduction
If a Terraform plan fails because API calls are using invalid credentials, you are on the right page to solve this problem.
The credentials for Terraform to manage infrastructure in Azure have an expiring date. This guide shows you how to renew these credentials (it is more like adding new valid credentials to the App "Terraform" in Azure).
Steps
1. Create new Azure Credentials 2. Update LastPass entry 3. Update Terraform variable set 4. Update GitHub organization secret 5. Create a reminder in Google Calendar
1. Create new Azure Credentials
Log in to Azure Portal.
Create a new entry under ActiveDirectory -> App Registrierung -> Auf Terraform Eintrag -> Zertifikate & Geheimnisse ->Neuer Geheimschlüssel -> Erstellen.
2. Update LastPass entry
Open the Lastpass vault.
Open entry Azure Credentials Terraform.
Replace clientSecet with the new secret vom step 1.
Adjust the expiring date in the LastPass entry.
4. Update GitHub organization secret
3. Update Terraform variable set
Open this edit page for the Terraform variable set "Azure Credentials".
Set the azurerm_client_secret to the new value of clientSecret in the LastPass entry.
Click "Save variable".
If you are not allowed to perform this action, ask someone else to do so.
Open this edit page for the organization secret AZURE_CREDENTIALS_TERRAFORM in your Browser.
Click enter a new value.
Insert the Azure Credentials Terraform entry from LastPass (JSON format) but remove all whitespace characters after the opening curly brace (e. g. {"clientId":...) and before the closing curly brace (e. g. ...nt.core.windows.net/"}).
Save changes.
5. Create a reminder in Google Calendar
Open the google calendar. Create a new entry one week bevor the expiring date. Add the following people: Dominik Wißler, Julian Bour, Pascal Kunz Put this link into the description: https://guide.ambimax.xyz/how-tos/azure/renew-azure-credentials-terraform.html
GitHub How-Tos
Introduction
How-To guides regarding GitHub
Connect to an existing repository
Introduction
When your are working on plugins directly in the vendor folder you may not have the plugin initialized as a git repository.
Use this guide if you have an existing codebase which is not connected to its github repository.
This also works if you already made changes to your code.
Step-by-step guide
- navigate to the root of your code
- run
git initto initialized a git repository - connect the repository using
git remote add origin [email protected]:<USERNAME>/<REPOSITORY-NAME> - run
git fetchto fetch latest changes (this will not erase your changes) - execute
git checkout -f main
If made some changes before, you should see them as normal using git status
Hint: if you messed anything up, just delete the .git folder and start over
GitHub Notifications
Introduction
Learn how you are notified when there is some information for you on GitHub.
Use Slack for notification
To use slack for notifications you need to create scheduled reminders for your user account.
When all notifications are received by slack you can disable most email notifications
Project analyzer
Introduction
This guide describes how to use the project analyzer tool. Project analyzer is a general purpose GitHub repository analyzer that can be used to track down common problems in repositories. Every repository is checked at a fixed interval and results are stored for later review.
Getting started
Visit the overview page to see all repositories. If you are looking for a specific repository, simply search it using the search bar. Warnings and Errors are shown when you click on a repository.
Quick fixes
For some problems like branch protection quick links to the page where the problem can be fixed or is explained are available. Just click on Fehlerbehebung or Mehr Informationen at the bottom of the problem description of a repo.
To quickly get to the project analyzer, drag the Bookmarklet on the overview page to your browser's bookmark bar.
How to use Xdebug
Introduction
It can be useful to debug problems and bugs in PHP with Xdebug.
This category shows you how to configure and use it in several environments.
Environments
Supported Versions and Compatibility
Visit this site to read about the supported versions and compatibility.
Xdebug with Docker Compose and PHPStorm
Table of content
Introduction
In this section you read about how to set up and use Xdebug (v3) in PHP projects with PHPStorm and Docker Compose. This guide uses a PHP image with version 7.4. PHP versions from 7.2 to 7.3 might also work, but have not been examined.
Install Xdebug
Either you already have a Dockerfile that defines your PHP image or you have to create a new one.
Existing Dockerfile
Add the following content to your Dockerfile:
RUN pecl install xdebug \
    && docker-php-ext-enable xdebug
New Dockerfile
If you do not have a Dockerfile for your PHP image, you can create one by inheriting from the used PHP image in your docker-compose.yml. Just add the RUN statement above.
Example for new Dockerfile
If this is your PHP service in the docker-compose.yml:
docker-compose.yml:
version: "3.7"

services:
  php:
    image: ambimax/php-7.4-buster
    volumes:
      - ./:/var/www:delegated
This could be your new Dockerfile:
Dockerfile:
FROM ambimax/php-7.4-buster

RUN pecl install xdebug \
    && docker-php-ext-enable xdebug
Configure Xdebug
To configure Xdebug for this environment you need to place the following file to /usr/local/etc/php/conf.d/xdebug.ini in your PHP image/container:
xdebug.ini:
xdebug.mode=debug
xdebug.discover_client_host=0
xdebug.client_host=docker.for.mac.localhost
xdebug.client_port=9003
Either you do it in the Dockerfile via COPY or in the docker-compose.yml via the volumes specification:
Dockerfile:
COPY docker/fpm/assets/conf.d/xdebug.ini /usr/local/etc/php/conf.d/xdebug.ini
docker-compose.yml:
version: "3.7"

services:
  php:
    image: ambimax/php-7.4-buster
    volumes:
      - ./:/var/www:delegated
      - ./docker/fpm/assets/conf.d/xdebug.ini:/usr/local/etc/php/conf.d/xdebug.ini
Verify installation
After you have re-build the new image with docker compose build php (php is the name of the PHP service in the docker-compose.yml) you can verify if Xdebug is installed by running the following command in your PHP container:
php --version
The output should list Xdebug among the installed extensions.
Configure PHP Container
Adjust the environment specification of your PHP service in the docker-compose.yml like the following:
version: "3.7"

services:
  php:
    image: ambimax/php-7.4-buster
    volumes:
      - ./:/var/www:delegated
      - ./docker/fpm/assets/conf.d/xdebug.ini:/usr/local/etc/php/conf.d/xdebug.ini
    environment:
      - PHP_IDE_CONFIG=serverName=Xdebug
      - XDEBUG_SESSION=PHPSTORM
XDEBUG_SESSION=PHPSTORMlets PHPStorm know, you want to establish a connectionPHP_IDE_CONFIG=serverName=Xdebugrelates to the PHPStorm PHP server called "Xdebug" you will create in the next section
Notes
Additional Xdebug configuration
You can set additional Xdebug configuration in your PHP service through the ENV XDEBUG_CONFIG:
    ...
    environment:
      ...
      - XDEBUG_CONFIG=idekey=PHPSTORM # e. g. instead of using XDEBUG_SESSION=PHPSTORM
More convenient CLI usage
To use the Xdebug extension only if intended, turn it off through the ENV XDEBUG_MODE:
    ...
    environment:
      ...
      - XDEBUG_MODE=off
Use it explicitly: XDEBUG_MODE=debug php ./script-with-breakpoint.php
Configure PHPStorm
In this section you only need to create a PHPStorm server.
Create PHPStorm server
Go to your PHPStorm settings with CMD + , and navigate to PHP -> Servers. Create a server like in the screenshot below. Note, that you have to set the correct path mapping:
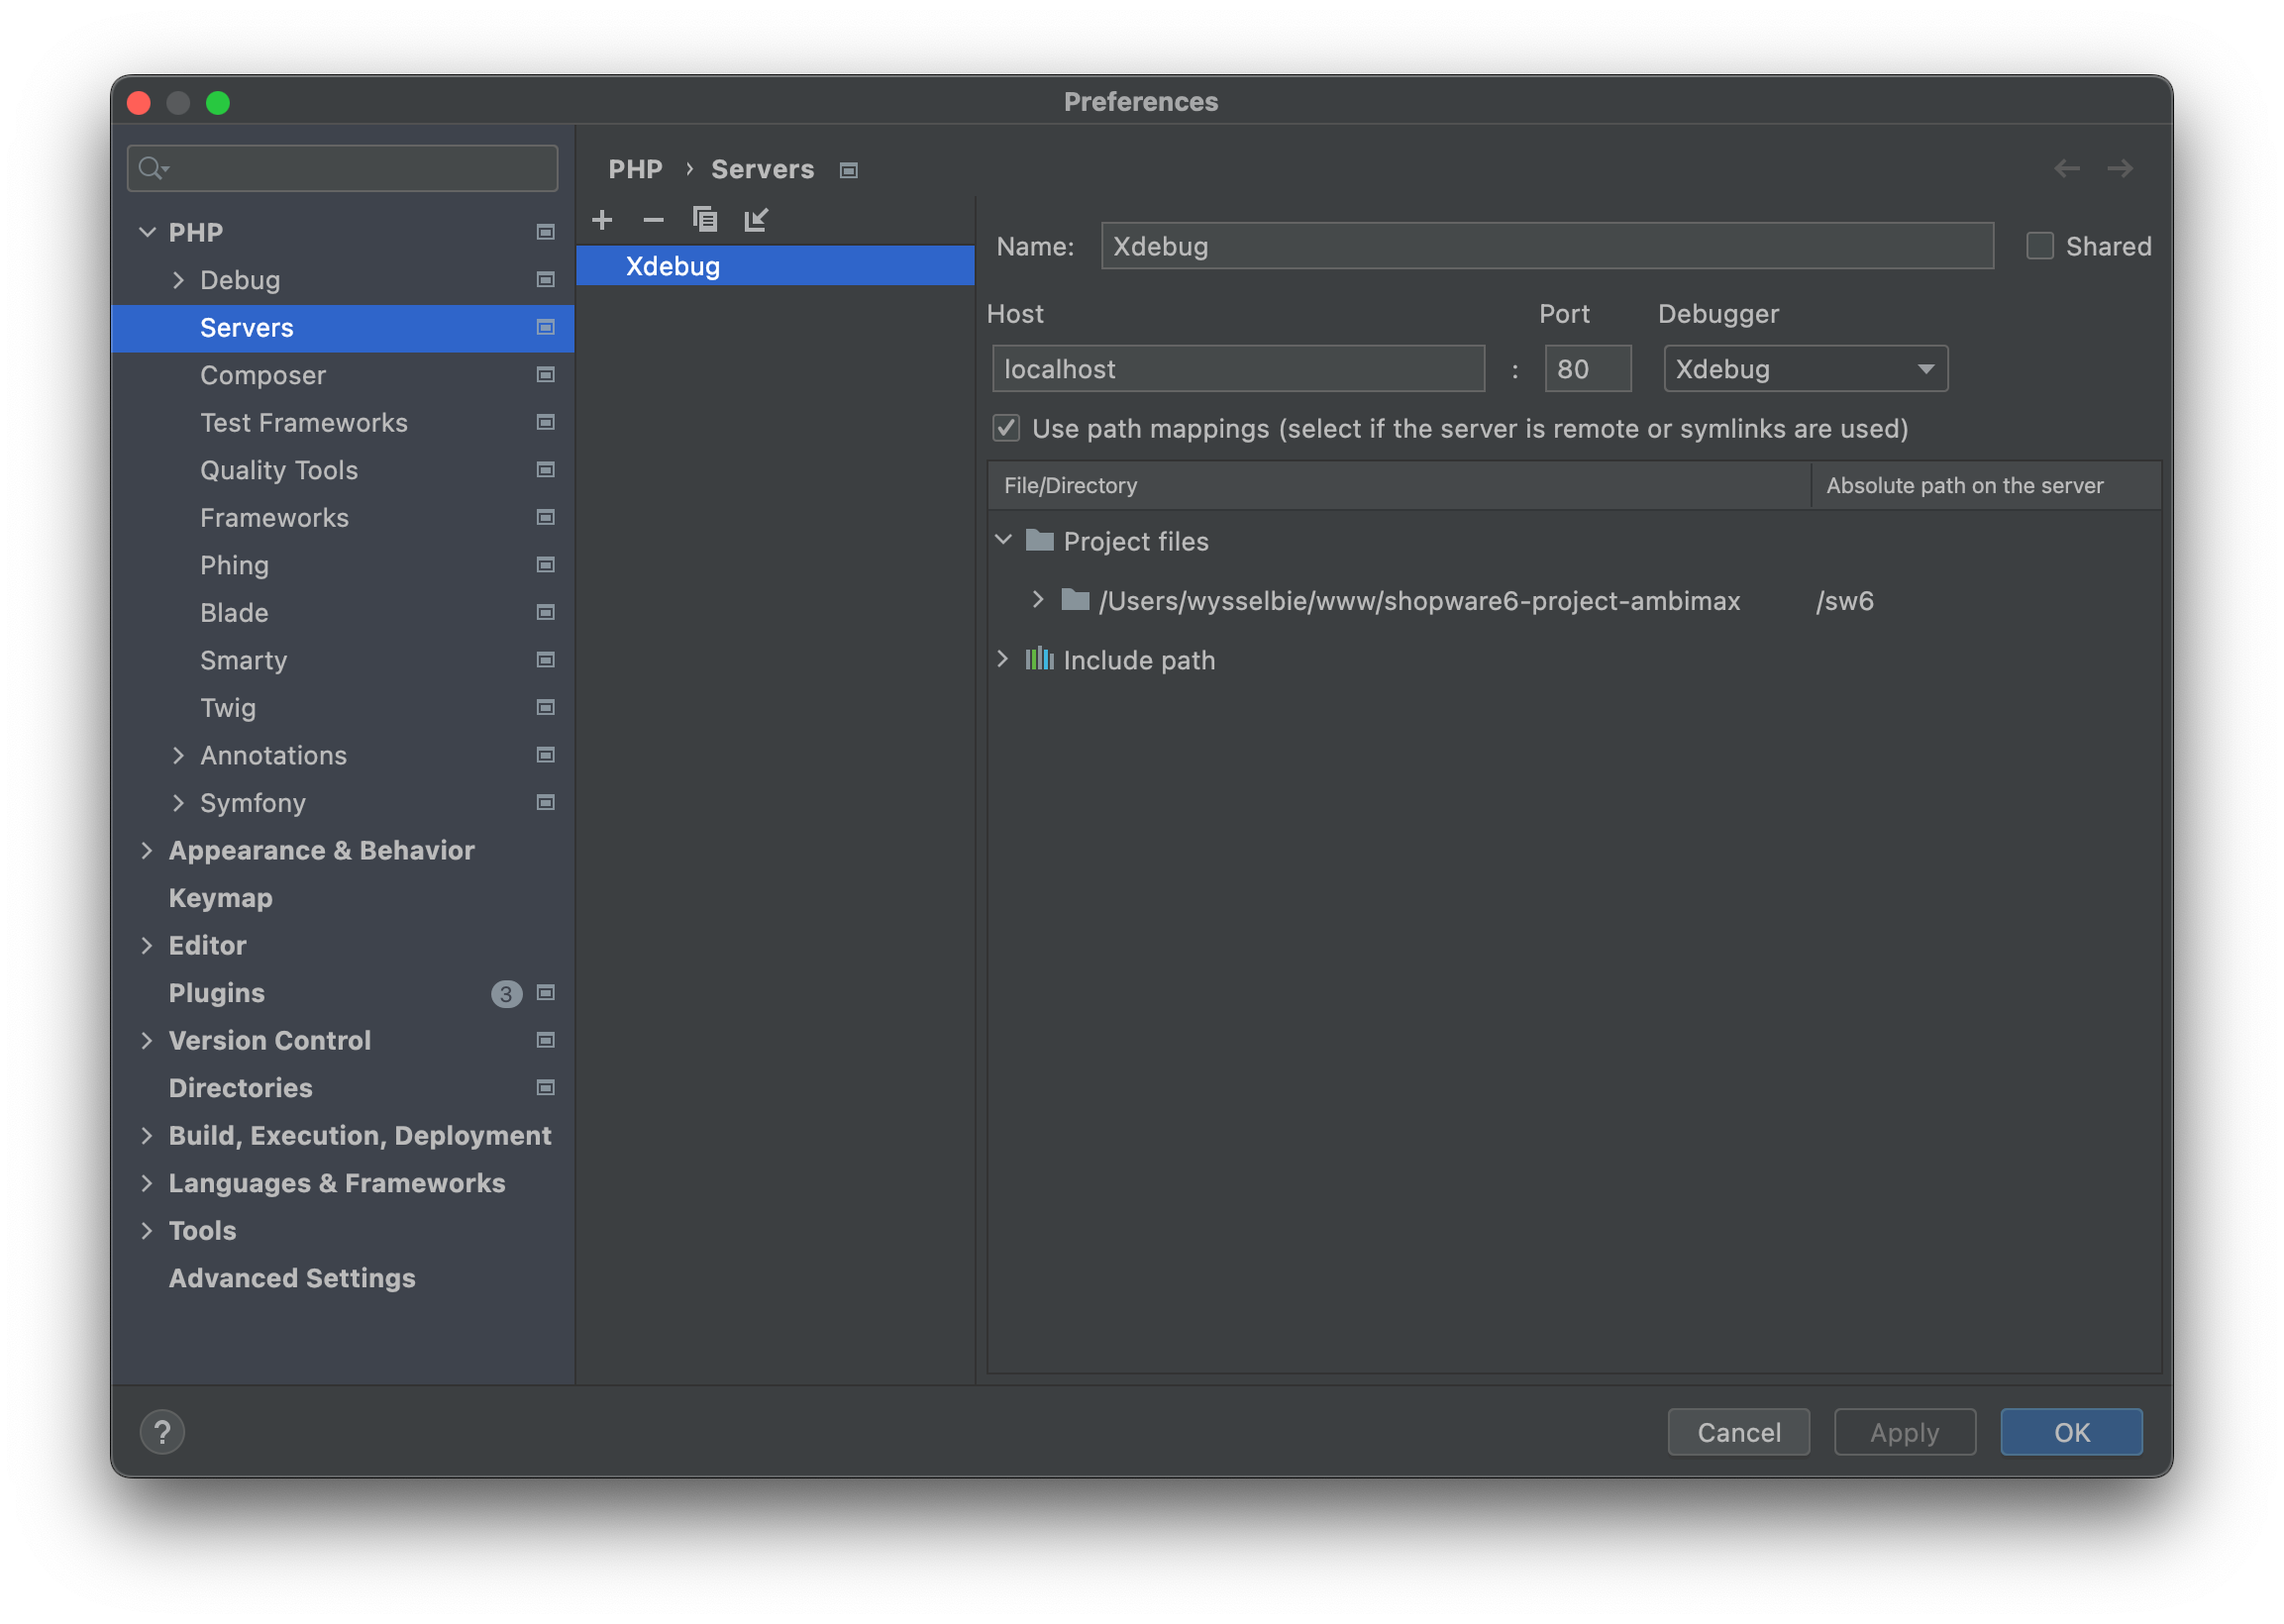
Press "Apply" and "OK".
Usage
Everything should be set to use Xdebug. Start listening for debug connections by clicking this icon in the top right corner of PHPStorm:

Now start debugging by using breakpoints and execute your commands or visit the respective page via browser. To stop listening for debug connections, click the icon again.
Infrastructure
Docker
Docker Images
Content
Overview
Docker Hub Images
- PHP Images:
- PHP 8.0:
- ambimax/php-8.0-alpine3.13
- ambimax/php-8.0-buster
- PHP 7.4:
- ambimax/php-7.4-alpine3.13
- ambimax/php-7.4-buster
- ambimax/php-7.4-fpm-buster
- ambimax/php-7.4-cli-buster
- PHP 7.3:
- ambimax/php-7.3-alpine3.13
- ambimax/php-7.3-buster
- ambimax/php-7.3-fpm-buster
- ambimax/php-7.3-cli-buster
- PHP 7.2:
- ambimax/php-7.2-fpm-stretch
- ambimax/php-7.2-cli-stretch
- PHP 7.1:
- ambimax/php-7.1-fpm-stretch
- ambimax/php-7.1-cli-stretch
- PHP 7.0:
- ambimax/php-7.0-fpm-stretch
- ambimax/php-7.0-cli-stretch
- PHP 8.0:
- PHP Miscellaneous:
- ambimax/php-builder (outdated)
- ambimax/php-tools
MS Azure Images
- Akeneo4 Project Delphin:
- akeneo4-project-delphin-cron
- akeneo4-project-delphin-fpm
- akeneo4-project-delphin-fpm-stages
- akeneo4-project-delphin-httpd-stages
- akeneo4-project-delphin-php
- akeneo4-project-delphin-source
- akeneo4-project-delphin-source-stages
- akeneo4-project-delphin-sso
- akeneo4-project-delphin-sso-stages
- akeneo4-project-httpd
- akeneo4-project-php
- Shopware:
- shopware6-project-berg:
- sw6-berg-fpm
- shopware6-project-ambimax:
- sw6-ambimax-fpm
- shopware6-project-petfriends
- sw6-petfriends-fpm-preview
- shopware6-project-berg:
- Helm Charts Shopware 6:
- helm/shopware6-preview
- helm/shopware6-production
- helm/shopware6-production-dbgit
- Vue Storefront:
- vsf-api-app
- vsf-api-es
- vsf-api-kibana
- vsf-base-app
- vsf-project-petfriends-api
- vsf-project-petfriends-app
- Miscellaneous:
- strapi
- sql-backup
- s3-sync
- docker-matomo
Ambimax Docker Registry Images
- Rotary:
- m2rotary-dev-dependencies
- Akeneo4 Project Delphin:
- akeneo-project-delphin-fpm
- akeneo-project-delphin-fpm-stages
- akeneo-project-delphin-httpd
- akeneo-project-delphin-httpd-stages
- akeneo-project-delphin-source
- akeneo-project-delphin-source-stages
- akeneo-project-delphin-sso
- akeneo-project-delphin-sso-stages
- Magento Project Delphin:
- magento-project-delphin-cli
- magento-project-delphin-fpm
- magento-project-delphin-nginx
- magentoinit
- Worklog Software
- react-worklog-api:
- react-worklog-api-cli
- react-worklog-api-db
- react-worklog-api-fpm
- react-worklog-api-nginx
- react-worklog-frontend
- react-worklog-frontend-app
- react-worklog-api:
- Composite UI:
- compositeui-module-petfriends-catalog
- cui-banner
- cui-petfriends-catalog
- Miscellaneous:
- node-exec-opt-app-index
- npm-registry
- matomo
- project-showdown
- dbinit
Descriptions
PHP
PHP Images
Links: Docker Hub
PHP 8.0
PHP 7.4
- ambimax/php-7.4-alpine3.13
- ambimax/php-7.4-buster
- ambimax/php-7.4-fpm-buster
- ambimax/php-7.4-cli-buster
PHP 7.3
- ambimax/php-7.3-alpine3.13
- ambimax/php-7.3-buster
- ambimax/php-7.3-fpm-buster
- ambimax/php-7.3-cli-buster
PHP 7.2
PHP 7.1
PHP 7.0
PHP-Miscellaneous
php-builder
- outdated
- Links: Docker Hub
php-tools
- This image contains a variety of different tools for PHP, such as codesniffer, phpunit and composer. Check Github for a more detailed list of which tools are included.
- Links: Github
Petfriends
petfriends-admin-dashboard
- The default Sapper template, with branches for Rollup and webpack.
- Links: Github
Akeneo
Akeneo4 Project Delphin
- akeneo-project-delphin-fpm
- akeneo-project-delphin-fpm-stages
- akeneo-project-delphin-httpd
- akeneo-project-delphin-httpd-stages
- akeneo-project-delphin-source
- akeneo-project-delphin-source-stages
- akeneo-project-delphin-sso
- akeneo-project-delphin-sso-stages
Shopware
Shopware6 Project Ambimax
-
This repository represents the base of a new Shopware 6 project.
-
Links: Github
Shopware6 Project Berg
Links: Github
- sw6-berg-fpm
Shopware6 Project Petfriends
Links: Github
- sw6-petfriends-fpm
Helm Charts
Helm Charts Shopware 6
Magento
Magento Project Delphin
- Links: Github
magentoinit
-
Docker image that prepares a volume for a magento installation. This image is only responsible for fetching build artifacts from s3.
-
To fully configure the project, additional work might be required downstream, like running a setup.sh script or setting up a database. To setup the database use the
ambimax/dbinitdocker image. -
Links: Github
Vue Storefront
-
This repository contains the recipes to build our vsf-* docker images. They are built using the code in the vuestorefront/vue-storefront and vuestorefront/vue-storefront-api repositories.
-
Links: Github
Website Projects
website-microservice-ambimax-applicationform
- Microservice that handles the ambimax job applications
- Links: Github
website-project-physiolymp
- This repository contains the code for the Physiolymp-Saar website
- Links: Github
website-project-ambimax
website-project-strauch
- Links: Github
Worklog Software
react-worklog-frontend
- This is the frontend container for the worklog software.
- Links: Github
react-worklog-api
- Symfony Api Platform Project for Worklogs
- Links: Github
jenkins
Build custom jenkins image for deployment pipeline
Links: Github, Docker Hub
jenkins-docker-deploy
- This repository should be used as downstream job for deploying docker images and creating a preview environment.
- Links: Github
jenkins-docker-build
- This repository should be used as downstream job for building docker images.
- Links: Github
jenkins-docker-sample-app
- This app is used to create a on the fly preview on a jenkins docker swarm host.
- Links: Github
Composite UI
cui-banner
This is the CUI banner service. It is responsible for managing and displaying banners.
Links: Github
cui-petfriends-catalog
This is the catalog microservice for petfriends. It is responsible for generating snippets related to products
Links: Github
Kubernetes
kubectl-do
-
A docker image that can be used to easily access digitalocean kubernetes clusters. Comes with a preinstalled doctl, kubectl and helm.
-
Links: Github
Semantic-release
docker-semantic-release
Generates docker image for simple semantic releasing via github actions.
Links: Github
Miscellaneous
bats
- Docker image for bats testing with batteries included:
- local testing
- CI/CD testing like Github Actions
- Support for Makefile, docker, docker-compose within bats tests
- Includes bats-assert and bats-file libraries
- Links: Github, Docker Hub
ansible-playbook-runner
- Ansible playbook can be run directly using the container. No local installation required
- Links: Github, Docker Hub
mysql-backup
- The mysql-backup is used for make basic MySQL backups. You can configure a cronjob and file upload.
- Links: Github
travis-tests
- outdated
- Links: Docker Hub
dbinit
-
Docker image that prepares a database container for a magento installation. This image is only responsible for fetching a database from s3. To fully configure the project, additional work might be required downstream, like running a setup script.
-
Links: Github
npm-registry
- This repository contains all configuration and deployment information needed for our private Node.js registry.
- Links: Github
project-showdown
- This was the Ambimax Svelte Website
- Links: Github
s3-sync
- This docker image synchronizes data with AWS S3 at a given CRON schedule. It is based on firespring/docker-s3-sync.
- Links: Github
docker-matomo
- Docker image with preinstalled matomo tailored to our needs. Exposes port 80 by default
- Links: Github
webapp-project-analyzer
-
This is the repository for Project Analyzer, a general purpose GitHub repository analyzer that can be used to track down common problems in repositories.
-
Every repository is checked at a fixed interval and results are stored for later review.
-
Links: Github
Sources
Kubernetes
Introduction
Kubernetes is a software to provide cluster functionality.
Table of contents
Quick Start
Introduction
This page helps to get started with Kubernetes management.
Since we mainly use Azure AKS as managed Kubernetes service, this guide uses the Azure CLI.
Preparation
Use the Azure CLI to save Kubernetes contexts to your local .kubeconfig.
Login Azure
First you need to login to Azure via the command line:
az login
Cluster list
List all available clusters:
az aks list --query "[].name"
Install context for cluster
Save credentials to your local .kubeconfig to grant access to a cluster listed on previous step:
# manually update "ambimax-staging" with desired name
clusterName=ambimax-staging; az aks get-credentials --overwrite-existing --name "$clusterName" --resource-group "$clusterName"
k9s management
Install k9s
Ensure k9s is installed
brew install k9s
Configure k9s
Download our default config here
Move config file to ~/.kube/config
mv ~/Downloads/k9s_config ~/.kube/config
Change the permissions so the config can only be accessed by you
chmod 700 ~/.kube
chmod 600 ~/.kube/config
you should see ambimax-servinga when running
kubectl config current-context
Use k9s
Just use the name to start the tool
k9s
Navigate tool with cursors or use key bindings like ESC. More documentation
| Action | Command | Comment |
|---|---|---|
| Show active keyboard mnemonics and help | ? | |
| Show all available resource alias | ctrl-a | |
| To bail out of K9s | :q, ctrl-c | |
| View a Kubernetes resource using singular/plural or short-name | :po⏎ | accepts singular, plural, short-name or alias ie pod or pods |
| View a Kubernetes resource in a given namespace | :alias namespace⏎ | |
| Filter out a resource view given a filter | /filter⏎ | Regex2 supported ie `fred |
| Inverse regex filter | /! filter⏎ | Keep everything that doesn't match. |
| Filter resource view by labels | /-l label-selector⏎ | |
| Fuzzy find a resource given a filter | /-f filter⏎ | |
| Bails out of view/command/filter mode | <esc> | |
| Key mapping to describe, view, edit, view logs,... | d,v, e, l,... | |
| To view and switch to another Kubernetes context | :ctx⏎ | |
| To view and switch to another Kubernetes context | :ctx context-name⏎ | |
| To view and switch to another Kubernetes namespace | :ns⏎ | |
| To view all saved resources | :screendump or sd⏎ | |
| To delete a resource (TAB and ENTER to confirm) | ctrl-d | |
| To kill a resource (no confirmation dialog!) | ctrl-k | |
| Launch pulses view | :pulses or pu⏎ | |
| Launch XRay view | :xray RESOURCE [NAMESPACE]⏎ | RESOURCE can be one of po, svc, dp, rs, sts, ds, NAMESPACE is optional |
| Launch Popeye view | :popeye or pop⏎ | See popeye |
View pod log
Use l to view logs.
SSH into pod
Use s to ssh into any pod.
Port forwarding
Select desired pod and use shift + f to add port forwarding.
For MySQL use 127.0.0.1 in TablePlus
Show secret
Navigate to : secret to view all secrets. Select any secret and press x to view its decoded content.
Sealed Secrets
Create a Secret
Use following command to create a new secret. Make sure to use your corresponding name and namespace.
kubectl create secret generic my-secret-name --from-literal=PASSWORD=p4ssw0rd --namespace=ambimax-staging --output=yaml --dry-run=client > my-secret-name.yaml
You should get a file like this:
apiVersion: <VERSION>
data:
  PASSWORD: cDRzc3cwcmQ=
  <SECRET KEY>: <SECRET VALUE> (base64)
kind: Secret
metadata:
  creationTimestamp: null
  name: <NAME>
  namespace: <NAMESPACE>
You can add more values manually, just make sure to encode them with base64.
To encrypt the secrets use the kubeseal command:
cat my-secret-name.yaml | kubeseal -o yaml > ./my-sealed-secret-name.yaml
Now you should get a file looking like this.
kind: SealedSecret
metadata:
  creationTimestamp: null
  name: <NAME>
  namespace: <NAMESPACE>
spec:
  encryptedData:
    PASSWORD: AgCES0rYq2pYpLTDg4bbhpJvTVTFhBxKIJhboSF61u+S+atFBvMk5DcOQ43AdrfKMct3pq0kG9RInLBbaVnAQ+kCuUTXPh4aPP0SmyIuXqXqP0IXV+u7EgpWaeNkWAMZ+xlMUOKo66V6+vqa+AmMOgbZktc7R3AScuAHknE/GUcoDdISaFXJs+2beUnE78iJ/hVBwDkwxf9mUdjbfiOmVyHjYOQfPvAombKBV3QGv/2DWXbP0bRuLeuD6bkxYMh7jITJIvckzzmjW/Hu3qlDb2oZC7CezdPtkl59m4JwBfvglbs/LXlgM06Tcz2Sa1cn9ynPMJUjUHZFYxyOZIH18mm8y79bHD8SYh9yIPq212I0fUblSWCdp9l5WktiUz8HrAp4YBM3jD3Jn6ppof9O8LeRBucQ0Ky89QA4bV+grh3bqkj6V1mOXaMQsitxlFSwXsZLE3ix3X+6iRpT3xqCcE3+A++OLwlIgrazCx+qV8+fstKUo6DeF4nimrAQqRsX3aLXX57K3PKj5SKzQrtGWLGEoikZuCnOA4IZFNeYLc8wKMyenRrNzfNiBYS+lAiKnvhrNVnHVOgn5vmoVzS3/WLa8o+o+Qdi2W0TCvRr1pHdyCQKVRS8Iu28fHcdfv2dLGFeDWT68cPCwyPLDtuPUGQhOqNE8rJhwEFcTHRxAm5ytpMafVo9vm+UPqnDFZHLvG17NL+Bp9k3hA==
    <SECRET KEY>: <ENCRYPTED SECRET VALUE>
  template:
    metadata:
      creationTimestamp: null
      name: <NAME>
      namespace: <NAMESPACE>
Update a secret
To update a secret create new one with exactly the same name/namespace. After sealing it, just copy over the encryptedData.
To get your new secrets to the container, make sure to sync the secrets app in ArgoCD before restarting it.
NodeRed
Introduction
This section provides general information on NodeRed.
Glossary
- Tab: By use case categorized pages that contain Flows.
- Referred to as "Flows" by NodeRed.
- Stored under
/data/flows/<name>.yaml
- Flow: A Group of Nodes inside a Tab, that contain encapsulated logic to solve a specific task or ticket.
- Node: Basic logic component of NodeRed.
- Message: A JavaScript Object which is sent from Node to Node
Development
Creating a new Flow
Requirements
- Determine the category of the flow and create a corresponding new grouping (ensure consistent coloring).
- Add a comment with flow title and description/Readme at the top left of the grouping.
- Clear arrays and objects in flow variables at the end of a flow.
- Name nodes meaningfully.
- remove debug logs
Best Practices
Config
Place a "set config" Node at the beginning and add your constants configurations to msg.config.
Use the STAGE Enviroment Variable to check if the system is in local/staging/production mode.
msg.config = {
  apiFilter: {...},
  filepath: env.get("STAGE") === "production" ? "/prod/path" : "/test/path",
  bucket: env.get("S3_STORAGE_BUCKET") || "test-bucket-fallback"
}
Functions and Logic
Define logic in advance in a "set functions" Node to set helper functions to messsage variables.
const items = [];
msg.addItem = (item) => items.push(item)
msg.getItems = () => items
Now we can use msg.addItem() later on in a loop without having to concatenate a Flow variable.
Loops
items.forEach(item => {
  msg.payload = item;
  node.send(msg);
})
When sending many Messages to make API requests use a Delay Node in rate limiter mode and set it to ~20msg/s
Wait for the end of a loop using a Trigger Node but make sure
- to use at least 10s when waiting for API requests.
- to extend the delay when a new message is received.
Implement complex loops with message limiter and continue variable. Useful when making several different API requests with the same Node.

System Integrations
Akeneo
Working with Akeneo can be done using the installed akeneo-request Node.
Make sure to configure the correct endpoint:
Akeneo READwhen fetching data.Akeneo WRITEwhen creating, updating or deleting data.
This ensures correct data monitoring on Akeneo's side.
Shopware
Use the link out Node to send large amounts of requests like product updates to the Shopware Queue Tab/Flow.
However there is a shopware-request Node you can use to make simple API request.
The Message data structure is the same for both usages.
AWS
For each AWS Service there is a dedicated Node.
Each Node gets its parameter directly from the Message starting with a capital letter.
Ex.: msg.Bucket, msg.Body, msg.Key
Check for further information: https://github.com/daniel-t/node-red-contrib-aws
Slack
Of course Slack Nodes exist but there is also a Send messages to slack Flow you can use to send simple preformatted ERROR/WARNING/INFO Messages.
https://github.com/travisghansen/node-red-slack
Git(hub)
Files
Files to commit:
/data/flows/*flow-manager-nodes-order.json/modules/*(when working with modules)
Files to be careful with:
/data/config-nodes.yaml: Contains global config profiles like the Akeneo READ/Akeneo WRITE though it does not contain sensitive data like tokens and passwords. Profiles usually contain the ${ENV_VAR} syntax since these values are defined during deployment.
/data/flows_cred.json: This file contains all sensitive data and is encrypted using the CREDENTIALS_SECRET (settings.js). When in local development this secret is likely not set, so the file is not encrypted. NEVER commit this file unencrypted.
If you really want to edit this file, get the deployment secret and set it locally. Before committing you should decrypt the file manually and validate your changes since you could change other values unknowingly.
https://github.com/ambimax/nodered-decrypt-credentials
Pull request and conflicts
When reviewing a NodeRed pull request there is an inconvenience which causes a file to have changes is almost every line. This is cause by NodeRed generating new Node IDs.
Conflicts in the flow-manager-nodes-order.json are very likely when working with multiple branches.
To fix:
- Export your made changes in NodeRed (
⌘+E). - Reset to the pull requests latest commit.
- Import your changes again (
⌘+I).
Package Management
Introduction
This section contains information on how we share our code.
Docker
Introduction
This page describes how we share our build Docker images.
We use a custom docker registry to share our images. You can find the registry at https://ambimax.azurecr.io/. The credentials for the registry can be found on LastPass.
Connecting to the registry
docker login ambimax.azurecr.io
When asked for credentials, enter the credentials from LastPass (search for "Docker registry azure ambimax").
After you have successfully logged in, you can use our docker images.
Node.js (Yarn / NPM)
Introduction
This page describes how we share our Node.js packages.
Prefer Yarn over NPM
We prefer to use Yarn Classic over NPM, as it is faster and generally more robust.
Connecting to the registry
We use a custom npm registry to share our packages. You can find the registry at https://npm-registry.ambimax.xyz/. The credentials for the registry can be found on LastPass.
You can use this guide to connect to our npm registry.
More information
The DevOps config and documentation for the repository is managed in this repository.
PHP (Composer)
Introduction
This section describes how we manage our PHP dependencies.
Connecting to packagist
We use private packagist to share our composer packages.
To authenticate with packagist, check out the guide on their website.
Composer dependency guidelines
Introduction
This page describes general guidelines that should be followed when working with a project that uses composer to manage dependencies.
Guidelines
Prefer composer install over composer update
Installing dependencies using composer install instead of composer update ensures that the lock file is being used. composer update ignores the lock file completely and installs all dependencies at their newest version, possibly risking random failures of the project.
Commit composer.lock
Lock files ensure that packages are installed exactly the same way they have been installed when the composer.lock was created. This means that a project does not randomly break when a dependency receives an update that introduces breaking changes (this even occurs on patch releases sometimes and cannot be avoided!).
You should therefore always commit your composer.lock. There is one exception though: If the project is a plugin, the composer.lock should not be committed! Plugins should always work when you add them using composer require.
You can read this blog post to find out more about the rationales behind using a lock file.
Only update our packages automatically
When a project references some of our composer packages, it might be tiresome to update the lockfile every time a package changes. To mitigate this, you can only update a specific set of dependencies.
For example, to update only packages in the scope ambimax, run the following command after a composer install:
composer update 'ambimax/*'
This updates the respective packages and creates a new lock file. This lock file does not need to be committed, as it only contains changes introduced by these packages.
Shopware
Introduction
This section provides general information on Shopware.
deploy a new shopware project
- Start with the helm values
- Add a new table and User to the Database
- Add a new APP to ArgoCD
- Add the URL to Digital Ocean
Add a database to the project
Benutze das Secret Ambimax Servinga Datenbank um dich einzuloggen
- Erstelle eine neue Datenbank mit folgendem Namen: {Projektname}_{Umgebung}
- Falls man ein Backup zum Einspielen hat, kann man dieses jetzt importieren
NOTE: Momentan muss man ein Backup einspielen. Bei einem neuen Projekt, sollte hier die lokale Datenbank des Projektes eingespielt werden.
- Benutzerkonto hinzufügen:
- Datenbank auswählen
- Den Tab
Rechtewählen - Benutzerkonto hinzufügen
- Name: {Projektname}_{Umgebung}
- Password: Ein neues Passwort hinterlegen.
- Benutzerkonto erstellen !! keine Anpassung an den Rechten vornehmen
Adding a domain to Digitalocean
Example for staging domains
- Log into Digitalocean.com
- Select ambimax.xyz under Domains
- Add the domain you put as Host of your project as the Hostname and the Cluster IP as the "will direct to"
- Create the record
NOTE: As the Host you don't need the whole Url for Example: sw6-ambimax-staging.ambimax-staging.k8s.ambimax.xyz will be ambimax-staging.k8s.ambimax.xyz in Digitalocean
Adding a new project to the Servinga deployment
Anpassungen am Github Repository
Value files hinterlegen
-
Erstelle einen neuen Dateipfad unter "deployments":
-
Format des Pfades {Projektname}/{Umgebung}
Beispiel: ambimax/staging
-
-
Hinterlege die value yaml files:
-
zum jetzigen Zeitpunkt müssen folgende Dateien angepasst werden:
- common.yaml
- deployment.yaml
- database.yaml
- media.yaml
-
Die Files können aus folgendem Pfad kopiert werden: values Ordner
-
Es müssen folgende Informationen angepasst werden:
-
| Valuepfad | Format | Beispiel | Filename |
|---|---|---|---|
| fpm/image | ambimax.azurecr.io/{github project name}/phpfpm | ambimax.azurecr.io/sw6-project-servinga/phpfpm | deployment.yaml |
| fpm/tag | {umgebung}-{Git Hash der action, welcher das image gebaut hat} | staging-66fa133 | deployment.yaml |
| shopware6/mediafile/s3/bucket | {name des s3 buckets des Projektes} | shopware-media-ambimax | media.yaml |
| shopware6/mediafile/s3/k8sSecret | {projektname}-{umgebung}-mediabucket | ambimax-staging-mediabucket | media.yaml |
| backup | kann momentan gelöscht werden | database.yaml | |
| mariadb/auth/existingSecret | {projektname}-{Umgebung}-mariadb | ambimax-staging-mariadb | database.yaml |
| mariadb/db/name & user | {Projektname}-{Umgebung} | ambimax_staging | database.yaml |
| hosts | sw6-{Projektname}-{Umgebung}.{Projektname}-{Umgebung}.k8s.ambimax.xyz | sw6-ambimax-staging.ambimax-staging.k8s.ambimax.xyz | common.yaml |
| redirects/host | {Umgebung}.{Projektname}-{Umgebung}.k8s.ambimax.xyz | staging.ambimax-staging.k8s.ambimax.xyz | common.yaml |
| redirects/regex | ^(https?://)?{Umgebung}.{Projektname}-{Umgebung}.k8s.ambimax.xyz/(.*) | ^(https?://)?staging.ambimax-staging.k8s.ambimax.xyz/(.*) | common.yaml |
| redirects/replace | https://sw6-{Projektname}-{Umgebung}.{Projektname}-{Umgebung}.k8s.ambimax.xyz/${2} | https://sw6-ambimax-staging.ambimax-staging.k8s.ambimax.xyz/${2} | common.yaml |
| shopware6/cdnUrl | {URL des CDN} | https://d2lzeca7uoxh2m.cloudfront.net/staging/files/public | common.yaml |
| shopware6/additionalEnv/name/value | sw6-{Projektname} | sw6-ambimax | common.yaml |
Secret files hinterlegen
-
Erstellen der Secrets:
- Hierfür muss der Servinga Cluster als Context hinterlegt sein.
- Folgende Secrets müssen erstellt werden:
-
{Projektname}-{Umgebung}-mediabucket.yaml
- Benötigete Infos:
- S3 Access Key: accessKeyId
- S3 secret Acces Key: secretAccessKey
- Benötigete Infos:
-
{Projektname}-{Umgebung}-mariadb.yaml
- Benötige Infos:
- Mariadb User Password: mariadb-password
- Benötige Infos:
-
- Erstellen des Fileinhaltes mit folgendem Befehl:
- kubectl create secret generic {Name des Secrets} -n ambimax-{Umgebung} --from-literal={name der Value}={Value} [--from-literal=...] --dry-run=client -o yaml | kubeseal -o yaml
- Secrets unter secrets/{kubernetesNamespace} hinterlegen.
New ArgoCD App
- Auf der Startseite von ArgoCD im oberen linken Bereich auf "NEW APP" drücken
- Folgende Felder anpassen:
- Application Name: {Projektname}-{Umgebung}
- Project Name: default
- Repository URL: [email protected]:ambimax/k8s-servinga.git
- Path:
- ../../deployments/{Projektname}/{Umgebung}/common.yaml
- ../../deployments/{Projektname}/{Umgebung}/media.yaml
- ../../deployments/{Projektname}/{Umgebung}/database.yaml
- ../../deployments/{Projektname}/{Umgebung}/deployment.yaml
- Destination: https://kubernetes.default.svc
- Namespace: ambimax-{Umgebung}
Shopware Development
Introduction
This section describes how to develop on our Shopware projects. Currently, all of out Shopware projects use Shopware 6.
Creating a new Shopware 6 project
To create a new project, follow the steps outlines in the template repository.
Shopware 6 template
Introduction
This page describes our Shopware 6 template.
Git repositories
The template requires a multitude of different git repositories to be maintained:
-
The base project template all projects are based on. To initiate a new project, check out the readme of this repository.
-
helm-charts-shopware-preview-production
Provides the Helm charts that are used to deploy Shopware projects.
-
helm-charts-shopware-production-db
Provides the Helm chart that is used to deploy the database. This chart is used for both the staging and production deployments.
-
Provides the Terraform workspace configuration used to provision the required server infrastructure on Azure.
-
Provides the Terraform workspace configuration used to provision the S3 bucket used for storing media files on AWS.
Technologies
Introduction
This section provides information on different technology stacks that are currently in-use by Ambimax® developers.
Node.js
Introduction
This section provides information on how we use Node.js.
Learning
Introduction
This page contains some useful resources for learning Node.js and ECMAScript.
Links
| Link | Description |
|---|---|
| devhints.io | Cheatsheet for ES2015+ syntax and functions. |
Node Version Manager
Introduction
Node Version Manager (nvm) is used to quickly switch between different Node.js versions. You should always prefer Docker over locally installed software, but for quick tests, nvm does the job pretty well.
Installation
Bash
See the official installation guide on the nvm repository.
Add the following to your .bash_profile or .bashrc:
enter_directory() {
if [[ $PWD == $PREV_PWD ]]; then
    return
fi

PREV_PWD=$PWD
if [[ -f ".nvmrc" ]]; then
    nvm use
    NVM_DIRTY=true
elif [[ $NVM_DIRTY = true ]]; then
    nvm use default
    NVM_DIRTY=false
fi
}

export PROMPT_COMMAND=enter_directory
This will automatically use the nvm version specified in a .nvmrc file.
To always install Yarn Classic, add the following to ~/default-packages:
yarn
Fish
See the official installation guide on the nvm repository.
Install fisher for fish package management:
curl https://git.io/fisher --create-dirs -sLo ~/.config/fish/functions/fisher.fish
Install bass for bash backwards compatibility:
fisher add edc/bass
Add the following files:
~/.config/fish/conf.d/nvm.fish
function nvm
   bass source ~/.nvm/nvm.sh --no-use ';' nvm $argv
end
~/.config/fish/conf.d/nvm.fish
function nvm_init --on-variable="PWD"
  set -l default_node_version (nvm version default)
  set -l node_version (nvm version)
  set -l nvmrc_path (nvm_find_nvmrc)
  if test -n "$nvmrc_path"
    set -l nvmrc_node_version (nvm version (cat $nvmrc_path))
    if test "$nvmrc_node_version" = "N/A"
      nvm install (cat $nvmrc_path)
    else if test nvmrc_node_version != node_version
      nvm use $nvmrc_node_version
    end
  else if test "$node_version" != "$default_node_version"
    echo "Reverting to default Node version"
    nvm use default
  end
end

function nvm_find_nvmrc
  bass source ~/.nvm/nvm.sh --no-use ';' nvm_find_nvmrc
end

nvm_init
This will automatically use the nvm version specified in a .nvmrc file.
To always install Yarn Classic, add the following to ~/default-packages:
yarn
Terraform
Introduction
"Terraform is an open-source infrastructure as code software tool that enables you to safely and predictably create, change, and improve infrastructure."
We mainly use Terraform VCS driven through Terraform Cloud. Here on https://app.terraform.io/app/ambimax/workspaces you can see all our maintained Terraform workspaces and their linked repository.
Table of contents
-
Local Development
How to develop Terraform projects on your local machine. -
Switch Versions
Guide on how to switch betweenterraformversions easily.
Local Development
Introduction
This page helps to start the local development on a Terraform project.
Preparation
To start the development, we need the local project connected to a Terraform workspace. With that we can set all needed variable sets in Terraform Cloud and also see the progress of every Terraform plan and apply.
Install terraform
Make sure you have terraform installed:
brew install terraform
Pull repository
Clone desired project with git clone.
Adjust Terraform configuration
Open the main Terraform file (often main.tf) in the root of the project.
Add the following lines to the beginning of the file:
terraform {
  cloud {
    hostname     = "app.terraform.io"
    organization = "ambimax"
    workspaces {
      tags = ["development", "local"]
    }
  }
}
If there already is a terraform { ... } block in the Terraform file, just add the cloud { ... } to it.
Create and connect Terraform workspace
Initiate the project with:
terraform init
This command will ask you for input. Create a new Terraform workspace in Terraform Cloud and name it as followed:
$ALIAS-$REPOSITORY
Where $ALIAS is your shorthand alias in Ambimax, like "dw" or "jb" and $REPOSITORY is the name of the project
repository like "terraform-kubernetes". With this definition you get a name like "dw-terraform-kubernetes".
After the command has finished you can see your Terraform workspace in the Terraform workspace overview.
Set all needed variables
Move to your newly created Terraform workspace in Terraform Cloud and go to "Variables". Now there you have to add all variables, the project requires.
Development
Now you can start to develop on the project. Use terraform plan and terraform apply to deploy your previously
implemented infrastructure.
If you are done and want to reset everything, remove the link to your Terraform workspace and delete it:
rm .terraform/environment # removes all links to your Terraform workspaces
terraform workspace delete $ALIAS-$REPOSITORY # deletes the desired Terraform workspace in Terraform Cloud
Switch Versions
Introduction
Sometimes you come to a point where terraform tells you that you need a specific version. This might happen, if you
connect a Terraform project to an already existing Terraform workspace that has an older Terraform version in use.
Switch local terraform version
To easily switch your local terraform version install tfswitch:
brew install warrensbox/tap/tfswitch
List available terraform versions and pick the desired one:
tfswitch -l
Workstations
Introduction
This section contains information and troubleshooting guides for developer workstations.
Linux
Introduction
This page contains information about our Linux workstations.
macOS
Introduction
This page contains information about our macOS workstations.